8. Configuring your remote firewalls for DFM
Configuring your remote firewalls to get access to DynFi Manager is very easy. You first need to configure one firewall rule to allow your DynFi Manager server to connect to SSH on your remote firewall. Repeat this on all the firewalls you want to connect to DynFi Manager.
We will teach you how to configure you SSH using password based connexion and after will review the key based SSH access method for enhanced security.
8.1. Getting access to your firewalls using SSH
8.1.1. Ensuring that SSH is enabled
You first need to make sure that your firewall has an SSH service enabled and listening on a default or specific TCP port.
You might want to refer to the pfSense SSH documentation or the OPNSense User Documentation
Login to the firewall you want to manage with DynFi Manager.
Go to: System >> Settings >> Administration
Make sure that “Enable Secure Shell” is ticked
Make sure that “Permit root user login” is ticked
If you are login using password tick “Permit password login”
Optionally change the default port used by the SSH server on your remote firewall
Save the updated configuration
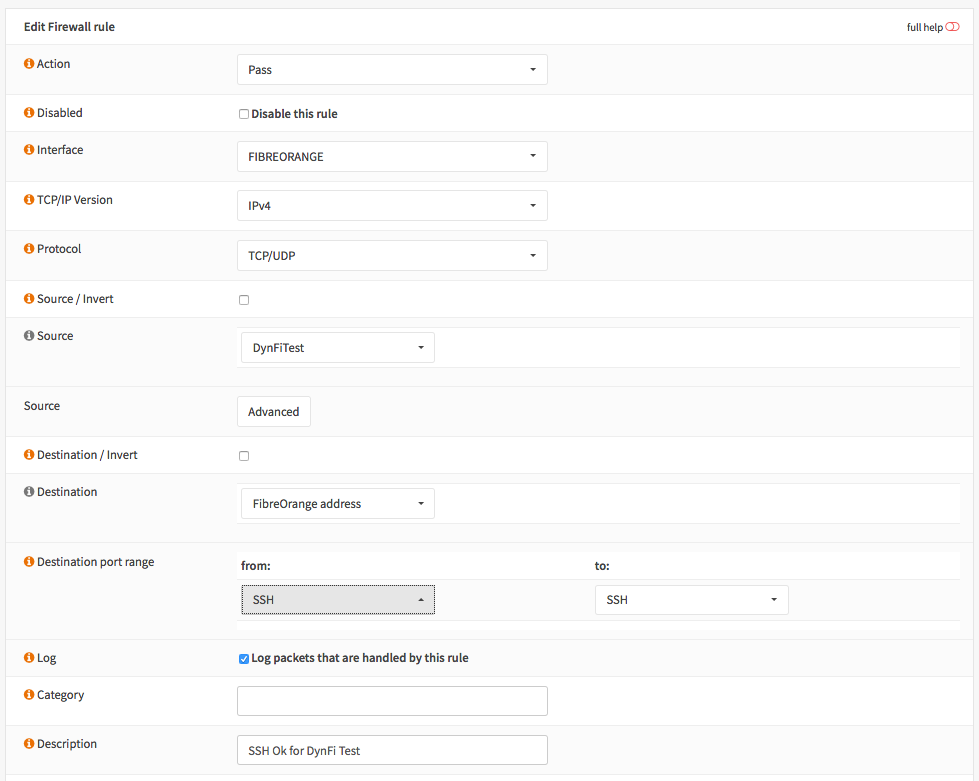
8.1.2. Creating the right firewall rule
Go to: Firewall >> Rules
Select your WAN interface (or the interface you want to connect to)
Add a rule to allow the IP of the DynFi Manager Server to connect to your remote firewall
You can now add your device using DynFi Manager.
Note
If you plan to use Direct View, please repeat the above for port HTTPS(443) and/or HTTP(80), depending on your setup.
8.2. Adding a remote firewall to DynFi Manager
Login to DynFi Manager using your credentials
Go to >> Devices
On the bottom of the page click on “+ Create Device”
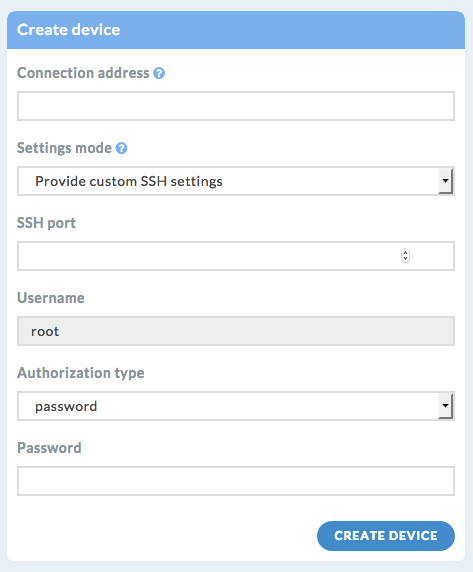
4. Fill the various fields of the formula 4.1. Connection address 4.2. SSH port (only if using non-default port number) 4.3. Username (you don’t need to provide a username - DynFi Manager will input “root”[1] by default) 4.4. Authorization type (Select “password”) 4.5. Password (input your password of your admin / root account) 5. Click “Create device” when done
An information pannel on the lower right corner of your window tell you that your device has been successfully created.
8.3. Enhancing the security of your SSH access
SSH is a quite secured protocol, but security can always be enhanced. This is specially important to consider since you will want to maintain the highest possible security level between your DynFi Manager device and your remote firewalls.
8.3.1. Limit access to your firewall on SSH port
The rule we have initially created allows anyone to connect to your remote firewall using SSH. Most of the time, this can be narrowed to a much more precise rule with restricted access to the SSH port.
If your DynFi Manager install benefits from a fixed IP address, you can input this address in the “from” field of your rule. If you need to access your firewall using SSH from more than one address, simply create an Alias with all the remote IPs and use It to filter incoming connexions to your firewall on the default SSH port.
8.3.2. Change access from SSH password to SSH key based
For more security, please consider using the “Key based SSH access” and change the default port of your SSH server.
8.4. Using SSH key based authentication
8.4.1. Background information on SSH Key Based access
Accessing your device with SSH key is a very straightforward process. The DynFi Manager team has developed a helper tool to ease the configuration of SSH key based access.
One has to understand how key based authentication is working. Once you have enabled the SSH server on your remote firewall, an SSH Server is deployed on all you firewalls.
In order to access the firewall every user needs to generate a key pair: a private key that the user will keep secret on his user account and a public key that the user will add to an existing user on the Server side (= on the firewall).
8.4.2. How to enable SSH key based access on DynFi Manager?
Login to your DynFi Manager Server using your admin account.
Click on the wheel at the top right of the screen and select “Device default”[2]
Select “SSH Settings”
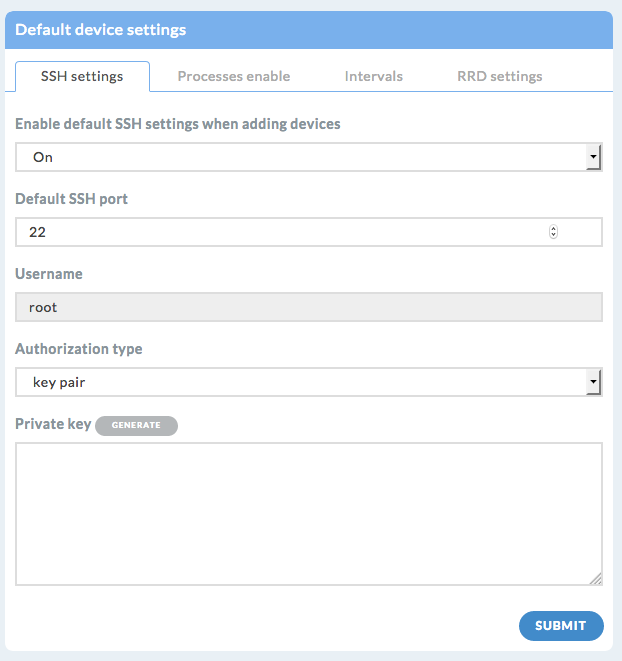
Choose if you want to apply default settings for newly created devices
Set the “Default SSH port” if needed
Change “Authorization type” and set It to “key pair”
Input a private key if you already have a public / private key pair at hand
Alternatively: click the “generate” button (this will automatically generate a key pair for you)
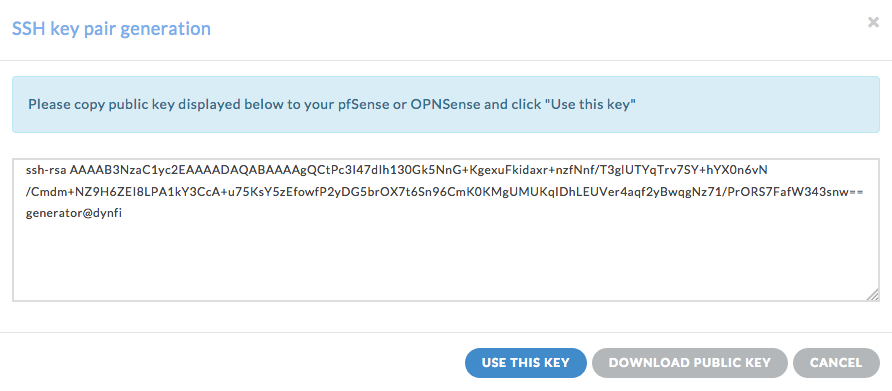
Copy / paste the private key displayed in the window and make sure you keep It in a safe place
Click the “Download Public Key” (this will download the public key to your computer)
Click “Use this key” in order to use this key
Click the “Submit” button
You are now ready to copy / paste the public key on your remote firewall(s)
8.4.3. Generating ECDSA keys for OPNsense ≥ 21.7.5
In OPNsense v. ≥ 21.7.5 which uses OpenSSL v. 8.8 - RSA keys have been deprecated. In order for keys to still work with your OPNsense install, you must generate an ECDSA key pair and copy / paste them into the DynFi Manager GUI.
ECDSA keys will probably be the default keys generated in DynFi Manager upcoming releases. For the time being, please follow these steps :
Open a terminal using your favorite Linux system
Generate the key pair using the following commands :
root@demo:~# ssh-keygen -t ecdsa
This shall generate a key pair with the private ecdsa key id_ecdsa and the public ecdsa key id_ecdsa.pub.
Copy / paste the private ecdsa key inside DynFi Manager either in the Preference >> Device defaults >> SSH settings or in the pannel Private key pannel available when adding a new device.
Copy / paste the public ecdsa key in the SSH keys of the root user account inside your firewall device.
You will then be able to add your devices smoothly in DynFi Manager.
Note
Make sure that you do not copy / paste wrongly formated keys in the pannels, this will lead to a broken key.
8.4.4. Configuring the public key on your remote Firewall(s)
Login to your remote firewall
Go to: System >> Access >> Users (OPNSense) or System >> User Manager (pfSense)
Edit the “root” account (OPNSense) or the “admin” account (pfSense)
Paste the key you have downloaded in step 3.7 into the “Authorized keys” field
Save
You can now update the settings of your SSH server and untick the “Permit password login” - make sure that you are doing this after proper testing.
In order to make sure that you don’t loose access to your remote device(s), we recomend that you allow a temporary access to your remote firewall(s) on HTTPs port so that in case of emergency you don’t loose all access to your remote device(s).
8.5. Firewall clusters
DynFi Manager detects when a firewall is part of a cluster. High availability settings and status information are available in the Network & VPN section. For optimal visibility, it is recommended to connect both machines in the cluster. High availability widget displays (if configured):
List of configured CARP interfaces and their statuses (MASTER/BACKUP)
List of Virtual IPs and their settings
Settings for config synchronization between the MASTER and BACKUP firewalls
On the MASTER firewall, a list of services running on the BACKUP firewall and their statuses
On the MASTER firewall, it is possible to manually trigger synchronization of config and services to the BACKUP firewall.
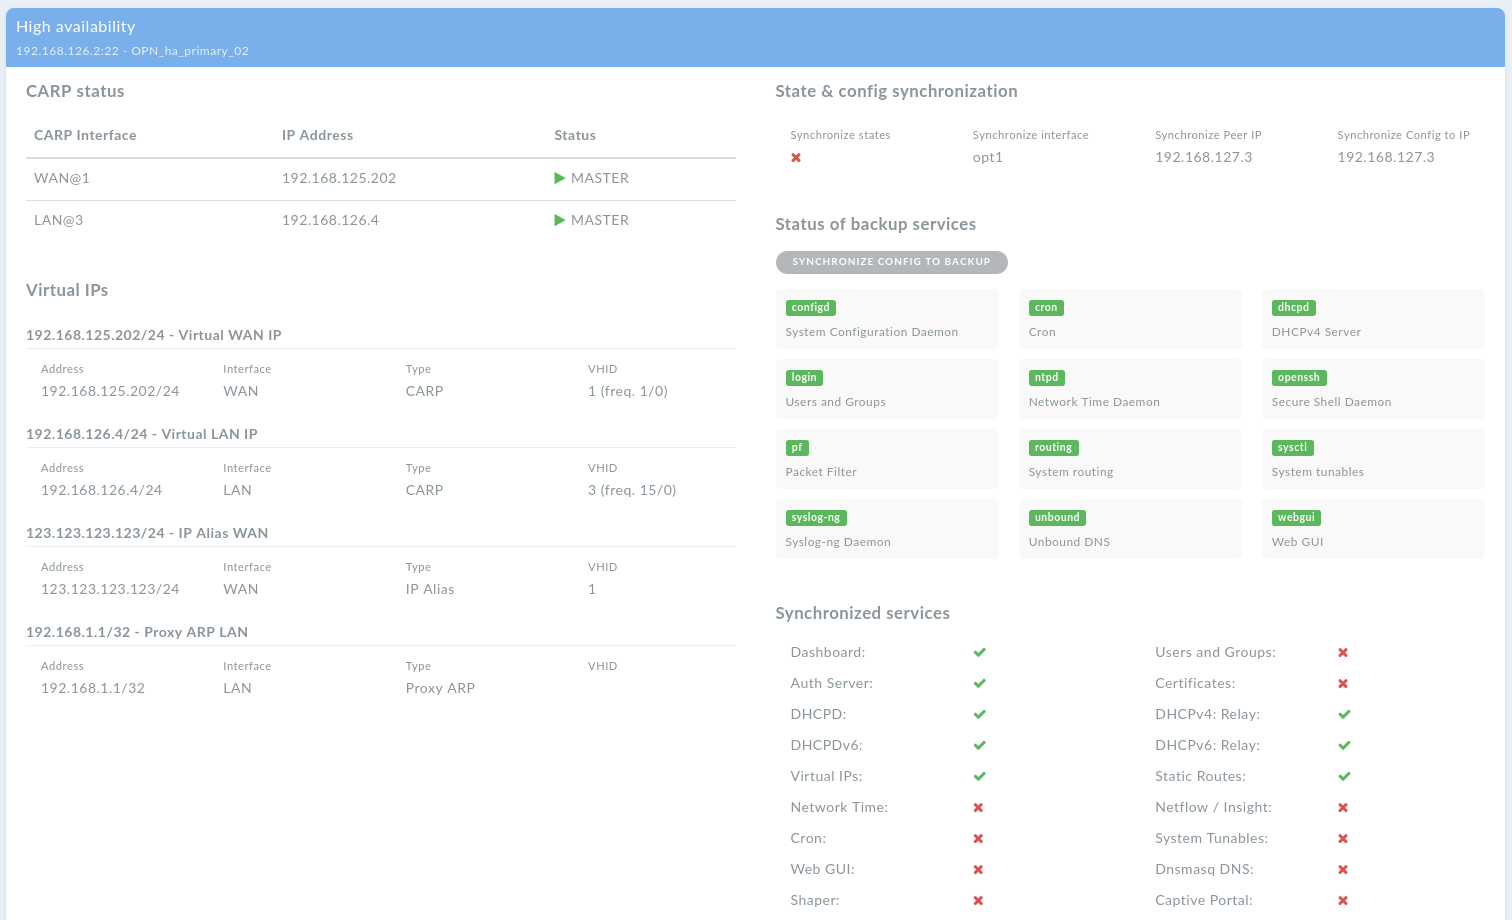
Cluster configuration - MASTER view